
Bamboo earrings are everywhere again. You see them on TikTok, in Instagram reels, and on the streets.
And here is the best part: you do not have to buy them. You can make your own. At home. For less than three dollars a pair.
But first, let us bust a common myth. Bamboo earrings are not actually made of bamboo. They just look like bamboo stalks because of their segmented, tubular shape.
They became iconic in 80s and 90s hip-hop culture. Artists like LL Cool J and Salt-N-Pepa made them famous. Today, a whole new generation is making them by hand and putting their own spin on the style.
So in this guide, we cover every method. No machine needed. Cricut. Glitter. Nameplate. Resin. Hoop. You pick what works for you.
Whether you are a total beginner or already crafting, there is something here for you. Let us get started.
What You Need to Know Before You Start
What Are Bamboo Earrings Made Of? (The Materials Truth)
Here is something most people get wrong. Bamboo earrings are not made of real bamboo. The name comes from their look, not their material.
They mimic the jointed look of a bamboo stalk. That is it. The actual material depends on how you make them.
Here are the most common materials used today:
| Material | Skill Level | Cost Per Pair | Finish Quality | Best For |
| Cardstock (layered) | Beginner | $0.25-$0.50 | Good | First-timers, practice runs |
| Foam sheets | Beginner | $0.30-$0.60 | Good | No-machine method, lightweight |
| Faux leather | Intermediate | $0.50-$1.00 | Excellent | Durable, professional look |
| Wood veneer | Intermediate | $0.75-$1.50 | Excellent | Natural, upscale finish |
| Resin | Advanced | $1.00-$3.00 | Outstanding | Custom, crystal-clear earrings |
| Acrylic/shrink plastic | Intermediate | $0.50-$1.00 | Very Good | Bold colors, unique effects |
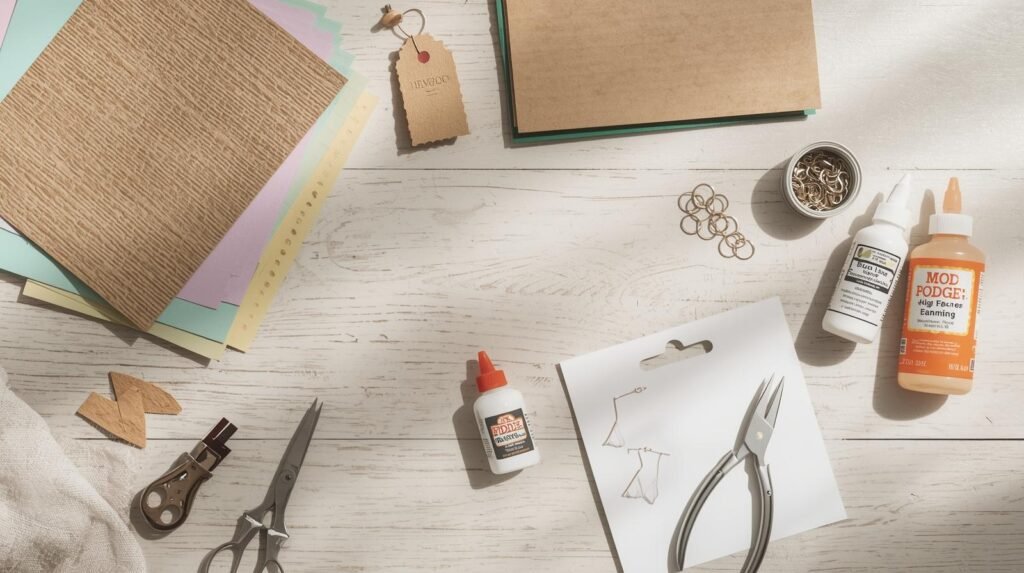
Essential Tools and Hardware for Any Method
Before you pick a method, gather these basics. They apply to almost every bamboo earring style.
You will need jump rings, earring hooks or posts, and needle-nose pliers. You also need a good adhesive. Not all glues work the same.
- E6000 glue: Best for faux leather and foam. Strong and flexible.
- Tacky glue: Great for layering cardstock. Dries clear and fast.
- UV resin: Best sealant for glitter finishes. Crystal-clear results.
- Mod Podge: Works as a beginner sealant. Less durable but easy to use.
One thing to avoid: hot glue on cardstock. It causes warping and ruins your shape. Trust us on that one.
💡 Pro Tip: Buy your earring hardware in bulk from AliExpress or Amazon. You get 100 hooks for under $3. That is a game changer for your budget.
Method 1: How to Make Bamboo Earrings Without a Machine
This is the best starting point. No Cricut. No cutting machine. Just scissors, foam or cardstock, and your hands.

Thousands of beginners start here. It is low cost and surprisingly effective. Furthermore, it teaches you the basics every other method builds on.
Materials List for the No-Machine Method
- Foam sheets OR thick cardstock (at least 110 lb weight)
- X-Acto knife and cutting mat
- Scissors for rough cuts
- Printed bamboo hoop template (free online or draw your own)
- E6000 or tacky glue
- Glitter or paint of your choice
- Mod Podge or UV resin for sealing
- Jump rings (5mm or 6mm)
- Earring hooks or posts
- Needle-nose pliers
Step-by-Step: No-Machine Bamboo Earrings
- Print or draw your bamboo hoop template. Standard size is 2.5 to 3 inches wide.
- Trace the template onto your foam sheet or cardstock. Use a pencil for clean lines.
- Cut out two pieces per earring. Stack them and glue together for thickness.
- Add a third layer if you want extra sturdiness. Let each layer dry fully before adding the next.
- If using foam, gently sand the edges with fine grit sandpaper. This smooths the shape.
- Apply your base coat. Use black, gold, or any color you love.
- Add glitter or texture on top while the paint is still tacky.
- Seal with two to three coats of Mod Podge or UV resin. Let each coat dry completely.
- Use a toothpick to poke a small hole at the top. Insert your jump ring.
- Attach your earring hook to the jump ring using pliers. Done.
💡 Pro Tip: Use a bone folder to score clean curves on cardstock before cutting. This gives you a cleaner edge with no jagged bits.
Method 2: How to Make Bamboo Earrings with a Cricut
If you have a Cricut, this is where things get exciting. The machine cuts your shapes with precision. No shaky lines. No uneven edges.
As a result, your earrings look professional every single time. This method is also faster once you set it up.
Which Cricut Machine Works Best?
Any Cricut works for bamboo earrings. But here are the best options:
- Cricut Joy: Good for simple shapes. Limited mat size but fast.
- Cricut Explore Air 2: The sweet spot. Handles cardstock and faux leather well.
- Cricut Maker 3: Best for wood veneer and thicker materials. Most versatile.
For blade choice: use Fine Point Blade for cardstock. Switch to Deep Point Blade for faux leather or thicker foam. Always use the StrongGrip purple mat for any earring materials.
Best Materials to Cut on Cricut for Bamboo Earrings
- Cardstock (layered 3 to 4 times): Affordable and beginner-friendly.
- Faux leather: Most durable and flexible. Gives a clean professional finish.
- Wood veneer: Stunning natural look. Tape down the edges before cutting.
- Acrylic or shrink plastic: Great base for resin topping. Bold and colorful.
Step-by-Step: Cricut Bamboo Earrings Tutorial
- Open Cricut Design Space on your computer or phone.
- Upload or create a bamboo hoop SVG shape. Size it to 2.5 to 3.5 inches wide.
- Duplicate for two earrings. Mirror them if needed for symmetry.
- Select your material type in Design Space settings. This controls blade pressure.
- Place your material on the mat. Smooth out any bubbles before loading.
- Press cut. Let the machine do its thing.
- Weed away the excess material carefully. Use a weeding tool for tight spots.
- Stack and glue your layers. Use tacky glue for cardstock. Use E6000 for faux leather.
- Let the glue cure for at least one hour before moving to the next step.
- Seal with spray sealant or brush on UV resin. Cure under UV lamp for 90 seconds.
- Add jump ring and earring hook. Your Cricut bamboo earrings are ready.
💡 Pro Tip: Back your cardstock earrings with black Kraft board. It mimics a laser-cut wood look and adds serious rigidity. Your finished earrings will feel sturdier and last much longer.
Method 3: How to Make Glitter Bamboo Earrings
Glitter bamboo earrings are one of the most requested styles online. They catch the light. They stand out. And they sell fast if you ever want to start a small business.
However, glitter done wrong flakes off within days. So this section covers how to do it right.
Glitter Types That Actually Work
Not all glitter behaves the same on earrings. Here is what you need to know:
- Fine craft glitter: Smooth, even coverage. Best for a classic sheen.
- Chunky glitter: More texture and sparkle. Harder to seal evenly.
- Pre-glittered cardstock: The easiest option. No loose glitter mess. Even coverage every time.
- Holographic glitter: Trending in 2025 and 2026. Color-shifting effect under light.
For sealing, always use UV resin over loose glitter. Mod Podge works for display pieces. But for everyday wear, only UV resin gives a hard, lasting, non-flaking finish.
Step-by-Step: Glitter Bamboo Earrings
- Cut your base shape using any method above. Cardstock or foam both work great here.
- Apply a thin, even layer of clear-dry adhesive or Mod Podge as your glitter base.
- Sprinkle glitter over the shape while the adhesive is still wet. Work section by section.
- Tap off the excess glitter over a paper plate. Save that excess. It adds up.
- Let the piece dry fully. Minimum 30 minutes. Do not rush this step.
- Apply UV resin in a thin coat over the entire glitter surface.
- Cure under a UV lamp for 90 seconds. Repeat three times for a hard, glossy finish.
- Attach your jump ring and hook. Show them off.
💡 Pro Tip: Pre-glittered cardstock saves you time and gives a more even result than hand-applied loose glitter. It also skips the mess. Grab it at Michaels or on Amazon.
Method 4: How to Make Bamboo Name Earrings (Nameplate Style)
Nameplate bamboo earrings are personal. They carry your name, your identity, your culture. That is exactly why they hit so hard in the 80s and 90s.
Today, people make custom nameplate earrings as gifts, for special events, and to celebrate their roots. This method has three approaches depending on your tools.
What Are Nameplate Bamboo Earrings?
Nameplate earrings combine the classic bamboo hoop base with a name or word on top. They come from Bronx and NYC hip-hop culture.
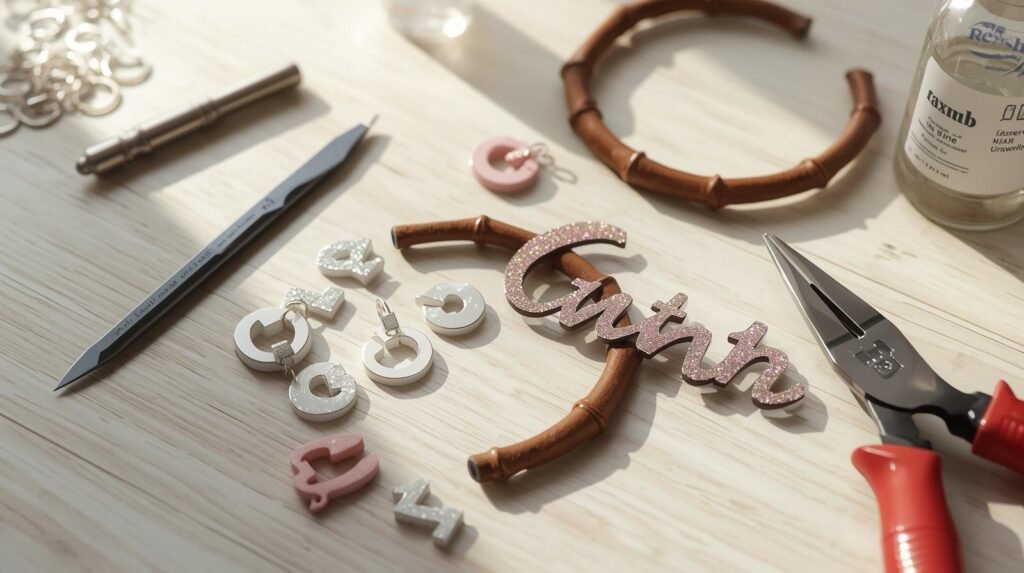
Artists like Salt-N-Pepa and MC Lyte rocked them hard. Now they are back. And making them yourself adds even more meaning to the piece.
Method A: Nameplate Earrings with Cricut (Most Precise)
This is the cleanest method. Your letters come out sharp and consistent every time.
- Open Cricut Design Space. Click ‘Text’ and type your name.
- Choose a bold brush script font. Fonts like ‘Sofia’ or ‘Janda Manatee’ work great.
- Select all letters. Click ‘Weld’ so they connect as one solid shape.
- Size your name to fit within your hoop base. Keep it proportional.
- Cut the name layer from glitter cardstock or contrasting faux leather.
- Cut your base bamboo hoop shape in a different color.
- Glue the name on top of the hoop base. Center it carefully.
- Seal the whole piece with UV resin. Add your hardware. Done.
💡 Pro Tip: Always weld your letters in Design Space before cutting. Without welding, the machine cuts each letter separately. That ruins the nameplate look completely.
Method B: Nameplate Earrings Without a Machine
No Cricut? No problem. This method takes a little more time. But the results are still impressive.
- Type your name in a bold font on your computer. Print it in your desired size.
- Cut the printed name out carefully as a paper stencil.
- Trace the stencil onto foam sheet. Press firmly for clean lines.
- Cut the foam name shape with a sharp X-Acto knife. Go slowly on curves.
- Glue the foam name onto your base bamboo hoop shape.
- Apply glitter over the name while glue is still wet.
- Seal with UV resin and attach your hardware.
Method C: Resin Nameplate Earrings (Advanced)
This is the most advanced method. But it produces the most striking result. Think crystal-clear, jewel-like earrings with your name inside.
- Get a silicone bamboo hoop earring mold. These are cheap online.
- Mix your resin according to the package instructions. Add glitter pigment for color.
- Pour a thin base layer into the mold. Cure for 60 seconds under UV lamp.
- Before full cure, embed a pre-cut vinyl name decal or letter charm inside.
- Pour a second layer of resin over the top to seal everything in.
- Cure fully under UV lamp. This usually takes 2 to 3 minutes total.
- Pop the earring out of the mold. Sand edges gently with 400 grit sandpaper.
- Apply one final coat of resin for a glass-like finish. Cure. Add hardware.
💡 Pro Tip: Work in a well-ventilated space with resin. Always wear nitrile gloves. UV resin is safer than epoxy resin for beginners because it only cures when you want it to.
Resin Bamboo Earring Troubleshooting (Cloudy, Sticky, Bubbles & More)
Nothing hurts more than pulling your resin out of the mold and seeing haze instead of shine.
Cloudy resin is one of the most common beginner problems. The good news? It is fixable. Almost every time.
Let us break down why it happens.
1. You Mixed Too Fast
When you stir resin aggressively, you trap micro air bubbles inside. Those bubbles cure into a foggy look.
How to fix it:
- Stir slowly for 2 to 3 full minutes.
- Scrape the sides and bottom of your cup.
- Let the mixture sit for 2 minutes before pouring.
- Use a heat gun or lighter lightly over the surface to pop bubbles.
Slow mixing = clear results.
2. Humidity Is Too High
Resin hates moisture. If your room humidity is above 60%, it can cure cloudy.
This happens a lot in summer.
How to fix it:
- Work in a dry room.
- Use a small dehumidifier if needed.
- Store resin bottles tightly sealed.
- Never work near an open window on humid days.
Control the environment. Control the outcome.
3. Your Mold Is Scratched or Dirty
Even tiny scratches in silicone molds scatter light and make resin look dull.
Dust does the same thing.
How to fix it:
- Clean molds with alcohol wipes before pouring.
- Replace old molds once they lose shine.
- Store molds flat and covered.
Shiny mold = shiny earring.
4. You Under-Cured UV Resin
If UV resin does not fully cure, it looks hazy or slightly milky.
How to fix it:
- Cure in thin layers only.
- Do not pour more than 2–3mm at once.
- Use a 36W or stronger UV lamp.
- Cure 90–120 seconds per layer.
Thin layers cure clear. Thick pours trap haze.
5. You Used Too Much Pigment
Overloading resin with glitter or color pigment blocks light and reduces clarity.
How to fix it:
- Use less than 10% pigment to resin ratio.
- For glitter, sprinkle lightly instead of dumping.
- Test small batches first.
Resin is not paint. Less is more.
💡 Pro Tip:
If your piece is already cloudy but fully cured, apply a final thin topcoat of clear UV resin. Cure again. This restores surface clarity in most cases.
How to Make Bamboo Hoop Earrings (The Classic Shape)
The bamboo hoop is the original. It is the style that started it all. Getting the shape right is everything.
So let us break down what makes a hoop look like bamboo, not just a regular hoop.
Understanding the Bamboo Hoop Shape
The classic bamboo hoop has a flat, wide body with horizontal segments across it. Those segments mimic the joints of a real bamboo stalk.
Here are the standard size options:
- Mini: 1.5 inches. Great for everyday wear.
- Standard: 2.5 to 3 inches. The classic 90s size.
- XL door-knocker: 4 inches and above. Maximum impact.
Creating the Segmented Bamboo Look
This is the detail that makes your earrings look authentic. Do not skip it.
- Draw or cut your base hoop shape first. Make it oval or circular with a flat top.
- Use a ruler and pencil to draw 3 to 5 horizontal lines across the hoop body.
- For faux leather: press a scoring tool along each line. This creates raised indentations.
- For cardstock: glue thin strips of extra cardstock at each segment line. This builds raised nodes.
- Paint or color alternating segments slightly differently. This adds depth and a 3D effect.
- Seal as usual. The result looks like a genuine bamboo joint pattern.
💡 Pro Tip: Even a small color variation between segments makes a huge visual difference. Try gold on one segment and a slightly darker tone on the next. It reads as handcrafted luxury.
How to Draw Bamboo Earrings (Your Own Template)
Drawing your own template gives you full control over size and shape. No two pairs look exactly the same. That is the beauty of going custom.
Moreover, it costs nothing. Just a pencil, paper, and two different-sized coins.
Step-by-Step Template Guide
- Grab a sheet of plain paper. Decide your earring size. Start with 2.5 inches for standard.
- Trace a large coin or compass circle for the outer edge of your hoop.
- Trace a smaller coin inside. This creates the inner cutout for the open hoop look.
- Connect the two circles at the top. This is the flat part where your hook attaches.
- Draw 3 to 5 horizontal lines across the hoop body for bamboo segmentation.
- Mark a small dot at the very top center. This is where your jump ring hole goes.
- Cut out your template. Trace it onto cardstock. Then use it every time you make a new pair.
Once you have a template you love, photograph it. That way you never lose it. You can also resize it digitally if you want larger or smaller versions later.
How to Wear Bamboo Earrings (Style Guide)
You made them. Now let us make sure you wear them right. Bamboo earrings are statement pieces. They deserve the right outfit and hairstyle to match.
How to Actually Put On Bamboo Earrings
This sounds simple. But many people bend their handmade hooks and ruin them. Here is the right way.
- Hook style: Open the hook slightly with pliers. Insert through your piercing. Gently close it back. Never yank or force it.
- Post style: Push through your piercing. Secure with a butterfly back or rubber stopper. For heavier DIY pairs, rubber stoppers grip better.
If your handmade earrings feel heavy after an hour, try lightweight earring backs. They distribute weight better and reduce strain on your lobes.
Outfit Pairings by Style
Bamboo earrings work with more outfits than most people think. Here are the best combinations:
- Classic 90s look: XL bamboo hoops with laid edges, baggy jeans, and a white tee. Simple and iconic.
- Street chic 2026: Medium bamboo hoops with a monochrome fit and clean sneakers. Let the earrings be the statement.
- Elevated evening: Gold glitter nameplate bamboo earrings with a little black dress. Keep other jewelry minimal.
- Casual everyday: Small bamboo huggies with denim and a basic tee. Low-key but stylish.
Hair tip: Bamboo earrings hit hardest with your hair pulled back or in a sleek bun. A high ponytail also works beautifully. The goal is to let the earrings breathe.
How to Care for Handmade Bamboo Earrings
Your homemade pairs need a little more care than store-bought metal earrings. Follow these simple rules and they last for months.
- Keep them away from water. No wearing them in the shower or rain.
- Avoid spraying perfume directly near them. The chemicals break down sealant over time.
- Store them flat in a small jewelry tray. Not loose in a bag or pouch.
- If glitter starts to lift, do a quick UV resin touch-up coat. Cure for 90 seconds and they are good as new.
Bamboo Earrings as a Side Hustle
Here is the thing: a lot of people who start making bamboo earrings for fun end up selling them. And it makes sense.
The materials cost under three dollars per pair. On Etsy, they sell for fifteen to thirty-five dollars each. That is a solid margin.
What Styles Sell Best
Based on trending searches and Etsy data, these styles move fast:
- Custom glitter nameplate earrings: People love personalized pieces.
- Cricut faux leather hoops in bold colors: Durable, professional-looking, high perceived value.
- Matching sets: Earrings plus a small matching pendant. Great for gifts.
Pricing and Packaging Tips
Price your earrings by adding up your material cost, your time at a fair hourly rate, and platform fees. Then add your profit margin.
For packaging, keep it simple. A small kraft paper card with your brand name behind each pair looks clean. Add a small care card explaining how to look after handmade earrings.
One important note: if you sell earrings, always disclose your materials. Many people have sensitive ears. Use hypoallergenic hooks and state that clearly in your listing.
Final Thoughts
So there you have it. Every bamboo earring method from beginner to advanced. All in one place.
You can start today with just cardstock and scissors. Or go all in with a Cricut and UV resin. Either way, the results are yours.
Making your own bamboo earrings connects you to a rich cultural history. It also lets you wear something truly unique. No one else has your pair.
Try the no-machine method first if you are brand new. Then experiment with glitter, nameplate, or resin as your confidence grows.
And if you want to understand where bamboo earrings come from and what they mean culturally, check out our other guides on the history and cultural significance of bamboo earrings.
Now go make something beautiful.
Frequently Asked Questions
Are bamboo earrings actually made of bamboo?
No. Bamboo earrings get their name from their shape, not their material. They mimic the segmented look of a bamboo stalk. Most are made from cardstock, foam, faux leather, wood veneer, or resin.
What materials do I need to make bamboo earrings at home?
For the basic method, you need cardstock or foam sheets, scissors or an X-Acto knife, glue, glitter or paint, a sealant like Mod Podge or UV resin, jump rings, and earring hooks. That is all.
How do I make bamboo nameplate earrings without a Cricut?
Print your name in a bold font and cut it out as a stencil. Trace it onto a foam sheet. Cut it with an X-Acto knife, glue it onto your hoop base, add glitter, seal with UV resin, and attach your hardware.
Can beginners make bamboo earrings?
Yes. The foam or cardstock method needs zero machines. Just basic tools and patience. Most beginners produce a wearable pair on their very first try.
How do you seal handmade bamboo earrings so glitter does not fall off?
UV resin is the most durable option. Apply a thin coat, then cure under a UV lamp for 90 seconds. Repeat three times. Mod Podge works for display-only earrings but is not durable enough for everyday wear.
How do you put on bamboo earrings with a hook?
Use needle-nose pliers to gently open the hook. Slide it through your piercing. Then close the hook back using the pliers. Never pull or force the hook. Always close it fully so it does not slip out.
How much does it cost to make bamboo earrings at home?
Very little. With basic materials like cardstock, foam, and hardware, each pair costs between fifty cents and three dollars. Cricut and resin methods cost a little more upfront but stay cheap per pair over time.
